One of the best nice-to-haves in any new car today is the ability to pair up their built-in infotainment system with your phone. Whether you’re an Android or Apple fan, one can’t argue that tapping onto either Android Auto or Apple CarPlay is a massive bonus. No longer would you have to contend with meager pre-included GPS or lackluster radio stations. But what about an Apple CarPlay install?
Many automakers include seamless plug-and-play with Apple CarPlay from the get-go. Albeit, some carmakers are keen to have you pay for that privilege as an optional extra. Regardless, you can get them fitted OEM-style, from the factory. But what if you have an older vehicle that doesn’t have an infotainment system… Or, a multimedia unit so ancient, that it could barely manage Bluetooth?
How then, could you enjoy navigating with Google Maps, jam it out with Spotify, or listen to all your favorite podcasts and e-books while on the go? Well, you’re not the first to notice this, as there are a plethora of options out there for an aftermarket Apple CarPlay install. It doesn’t matter how old a vehicle might be, as long as you could hook up a stereo to it, you too could install Apple CarPlay.
- Can You Install One?
- Aftermarket Head Units
- How To Install
- Setting Up The App
- Head Unit DIY Installation
Can You Install Apple CarPlay In Any Car
We’ll dive deeper into how you can manage an Apple CarPlay install right from home, with just a few simple tools at hand. But for now, let’s answer a pressing question – can you install Apple CarPlay in any car? Yes, indeed you can. Granted, truly vintage cars might require a bit more work to get them working right. But for the vast majority of vehicles, you see out on the streets, you can install one.
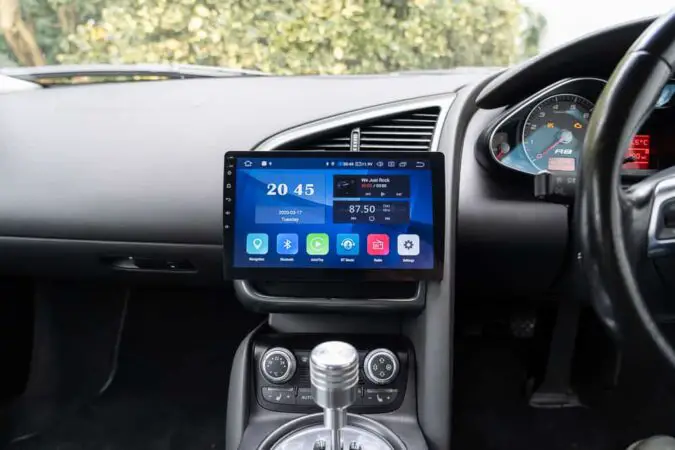
If your car doesn’t already include an infotainment system capable of linking up with Apple CarPlay, you could install aftermarket head units. Or, you might also know them as aftermarket stereos and radios. In other words, this means that installing Apple CarPlay requires that you rip out a car’s old radio-slash-stereo unit on the center console. And, replacing it with an aftermarket head unit.
The one thing to bear in mind is the DIN size of these respective aftermarket head units. DIN is their primary standard of measurement, as to how large those head units are. Generally speaking, there are only 2 DIN sizes that concern head units:
- Single DIN – 2-inches tall, and 7-inches wide
- Double DIN – 4-inches tall, and 7-inches wide
Most automakers standardize their vehicles to accept either a single DIN or double DIN. You’ll then need to acquire an aftermarket Apple CarPlay-compatible head unit that conforms to them. This is crucial, as you can’t, for example, install a larger double DIN head unit into a tiny single DIN slot. It has to be the same size. Nevertheless, either DIN size could handle an Apple CarPlay install.
Apple CarPlay Head Unit
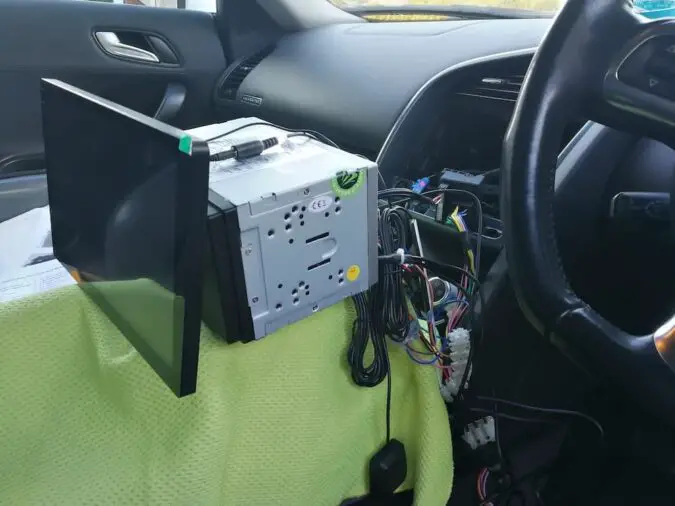
Speaking of, there’s the matter of the aftermarket head unit itself for an Apple CarPlay install. We’d have to remember that Apple CarPlay’s user interface requires a large smartphone-sized screen and perhaps even bigger. With that in mind, you’ll have fewer options if you have a car that only accepts a single DIN. Granted, there are single DIN head units out there with pop-up or floating displays.
Should you prefer that the screen sits flush against the center console, double DIN is the most ideal way to go with an Apple CarPlay install. Nonetheless, you have choices either way. There’s an array of aftermarket Apple CarPlay-compatible head units available to choose from. Big brands like Sony, Pioneer, Kenwood, JVC, Alpine, and more offer their own twists on how Apple CarPlay works.
Before you go out and buy a head unit, consider these factors and question if an aftermarket head unit is really your best bet:
- Cost – Some of the better aftermarket Apple CarPlay-compatible head units cost $300 to $400. Yet, you’ll also find high-end ones for $700 or higher, and this doesn’t yet count installation costs.
- Installation Process – Speaking of, not all head units install the same way. Some are easier to install and integrate with your car than others. For DIY installations, this can make a huge difference.
- Lease – Are you leasing a car instead of owning it? If that’s the case, whoever’s leased a car to you might not approve of you swapping out the radio for an aftermarket head unit. Ask them first.
- Buying A New Car – Remember, Apple CarPlay-compatible head units are expensive. Are you on the way to getting a new car soon? If that’s so, an Apple CarPlay install might not be worth it.
Install Apple CarPlay In Old Car
Here are a few other feature-based considerations when you’re choosing an aftermarket head unit:
- Touchscreen – Does it even have a touchscreen? And if so, what type of touchscreen does it feature – capacitive (smooth and responsive) or resistive (cheaper and could be used with gloves).
- Connectivity – Can you only connect your phone with the head unit with a Lightning cable? Or, does it have Bluetooth or better even still, fully wireless pairing between your phone and the head unit (you can learn more in our guide on how to sync my phone to my car).
- Functionality – What other functions does it have besides pairing up for Apple CarPlay? Can you set it to broadcast from radio stations? Could it play CDs, or have an equalizer to fine-tune the audio?
- Android Auto – Just in case you might change phones down the line. Or, if your friends want to pair up but have an Android device, it’s best to get head units that can link up to Android and Apple.
- Digital Assistant – Besides Siri, some head units also come with their own digital assistants. These are usually Amazon Alexa, or perhaps those head units might feature built-in voice control.
- Screen Size – Aftermarket head units come in various screen sizes. Usually, they’re 7-inches or slightly below, such as 6.8- or 6.7-inch screens. Yet, some are much larger, 10-inches or more.
- Performance – If all you need is to run your maps and listen to music, you don’t need a powerful head unit. However, if you value slick performance and rapid boot times, you’ll need a faster processor.
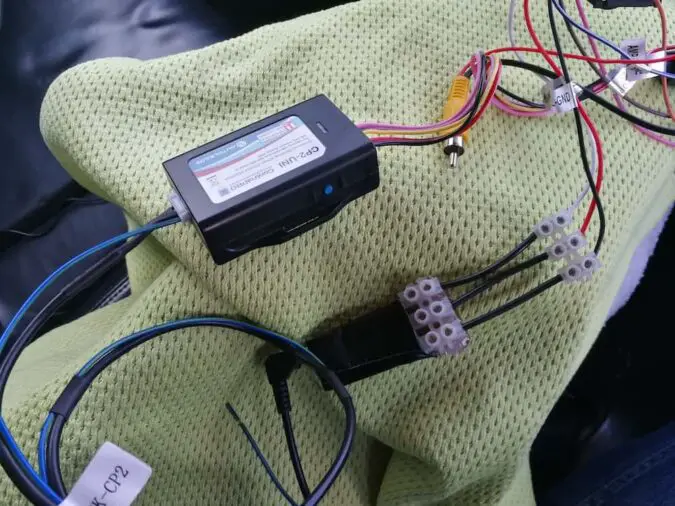
- Backup Cameras – Moreover, some head units could be paired up with backup cameras. As soon as you shift into reverse, it’ll swap out the Apple CarPlay interface and display what’s behind you.
- Outputs – Certain head units have more output ports than others. For instance, they might feature a couple of USB ports to charge your phone. Or, preamp outputs to add amplifiers to your car.
- Ease Of Use – A learning curve can be expected with some head units. Though, others are easier and more intuitive to use. Some head units even feature neat functions like split-screen viewing.
Best Apple CarPlay Head Units
Having mentioned that, here’s a quick list of the best aftermarket head units if you’re considering an Apple CarPlay install (in no particular order). This isn’t a definitive list, as there are plenty of options on the market today, including smaller no-name brands. You can cross-reference your choices with our list of considerations up above to find the best head unit to suit your needs.
| Head Unit | Din Size | Screen Size | Android Auto? | Other Key Features | Pricing |
|---|---|---|---|---|---|
| Pioneer DMH-W4660NEX | Double | 6.8-inch | Yes | Wired/Wireless CarPlay (And Android Auto), Amazon Alexa, 13-Band EQ, AM/FM Radio, Dual-Backup Camera Input | |
| Sony XAV-AX5500 | Single | 6.95-inch | Yes | 10-Band EQ, Dual USB Ports, Preamp Outputs, Smartphone Mirroring (Weblink), Backup Camera Input | |
| Kenwood DMX4707S | Double | 6.8-inch | Yes | Voice Control, 13-Band EQ, Backup Camera Input, Smartphone Mirroring, FLAC Playback, SiriusXM Radio | |
| JVC KW-M560BT | Double | 6.75-inch | Yes | FLAC Playback, AM/FM Radio, 13-Band EQ, Backup Camera Input, Preamp Outputs, Smartphone Mirroring | |
| Alpine iLX-W650 | Double | 7.00-inch | Yes | AM/FM Radio, Voice Control, Built-In Amplifier, FLAC Playback, Dual Backup Camera Input, SiriusXM Radio |
How To Install Apple CarPlay In My Car
When discussing an Apple CarPlay install, there are one of two scenarios:
- You already have an infotainment system or head unit that’s compatible with Apple CarPlay. All you need to do now is install it software-wise and have it running.
- Or, you don’t have an infotainment or multimedia head unit that’s capable of running Apple CarPlay. So, you’ll have to install a new, compatible head unit first, and then set things up.
We’ll be looking at both scenarios, starting with installing the app and getting your phone paired up with your infotainment system or compatible head unit. This is pretty simple, starting with plugging your phone into the infotainment or head unit. Or, using a wireless connection, if your car supports that. Once that’s done, you’ll have to jump through a few more hoops on your iPhone.
How To Set Up Apple CarPlay
To pair your iPhone with a compatible head unit or infotainment system that supports Apple CarPlay, here’s what you need to do:
- First, start your car up and ensure that your device is unlocked and that Siri is turned on (to learn more, check out our guide on how to turn off Apple CarPlay).
- Now, plug your iPhone into your car to set up CarPlay. Here, there are 3 options:
- If your car only has USB, plug the iPhone into the available USB ports. Note, make sure you plug the cable into the right USB port to sync up with Apple CarPlay. The right USB port might have an Apple, CarPlay, or smartphone icon labeled as an indication. Make sure that your phone is unlocked and set to the home screen. Then, the CarPlay UI will pop up on your infotainment system or head unit.
- Should your car have both USB and wireless connections, plug it into the USB port first, as per the earlier steps. Once it’s been paired up, you’ll see a notification on your iPhone, telling you that you can then connect wirelessly next time. A USB synching will be required for the initial set-up, though.
- If your car only has wireless connections, press and hold the voice command or microphone button on the steering wheel. At the same time, ensure that your infotainment system or multimedia head unit is in its wireless or Bluetooth mode. At the same time, head to your iPhone’s Settings menu, tap into General and open up the CarPlay settings. Now, look under Available Cars, and select your car.
- Do all this, and you’ll now have access to CarPlay. You can then configure other options, like:
- Re-arranging the CarPlay app icons.
- Add or remove available CarPlay apps.
- Change your CarPlay wallpaper.
- Have Siri announce messages for you.
Car Stereo Installation
This is far trickier, as it requires that you remove your old radio-slash-stereo unit, and replace that with a new head unit. If you don’t have the right mechanical skills, patience, tools, or risk damaging your car, it’s best to ask for help. Replacing your existing multimedia system with an Apple CarPlay-compatible head unit could either be extremely challenging or rather easy. It all depends…
In some cars, it could take as little as 30 minutes (assuming you have a bit of skill and experience) to a new head unit. Meanwhile, other cars, despite swapping it with the same head unit, could take at least 3, 4, 5 hours or more. There are a few factors that play into this:
- Dash Layout And Interior Trim – To remove your old radio-slash-stereo or infotainment system, you’ll have to take apart your dashboard. In certain makes and models of cars, removing the trim could be tedious. Some parts of the dash might be stubborn and take a lot of muscle just to take them apart.
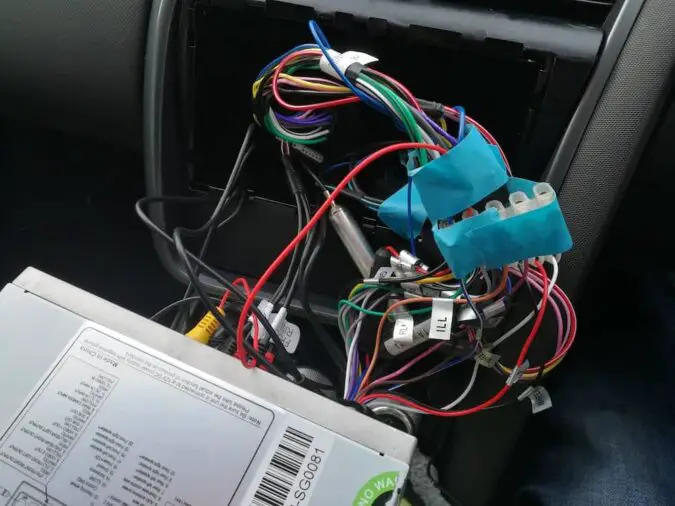
- Wiring And Electrics – You’ll then have to connect your car to the new head unit. This is done by connecting all the wires together. However, different makes and models of cars have varying layouts of wires. Some may have wiring harnesses that require a bit of tweaking before you can connect them.
- Mounting And Installation – Finally, there’s the process of installing the new head unit. Many of these kits include various adapters to make them fit more snugly against your car. For the most part, it can be tough, which is why installing a new head unit is best left to specialist technicians.
Here’s a general summary of the step-by-step process of swapping out your head unit for an Apple CarPlay install:
Step 1: Get All The Tools Needed
Most of the tools that you’ll need are rather simple:
- Screwdrivers (Philips and flathead, of varying sizes)
- Wrench/Socket Set (Often 8mm and 10mm)
- Wire Strippers
- Electrical Tape
- Plyers
- Prying Tools (a.k.a. Dashboard or panel removal tools)
- Solder And Soldering Iron (Or wire crimps/clamps if you’d rather not solder)
- Heat Shrink
- DIN Tools (For removing the radio)
Before we begin with anything, it’s a good idea to disconnect your car’s battery. This way, you won’t risk shorting and blowing any fuses. You can use that wrench and socket set for this. Also, it’s worth highlighting the most important tool for replacing a stereo unit – the dash prying and removal tools. These make it far easier to take apart individual pieces of interior trim without damaging them.
Step 2: Taking Apart The Interior Trim
Now, you can proceed with taking apart your dash and interior trim surrounding the old radio unit. It can be trickier on some cars than others, mind you. While you’re doing this, focus primarily on those trim pieces that surround your existing radio unit. To get a better clue on what trim pieces that need removing, try to find a manual online. Most have recommended using guides from Metra Online.
They even have a Vehicle Fit Guide, where you can find interior trim removal techniques. All you need to do is find the specific make and model of your car. Alternatively, you could reference video guides on YouTube, or a repair manual. Removing interior trim takes a lot of time, and patience, and by being a tad gentle. Use your trim removal tools, gently pry the corners, and work your way around.
Step 3: Removing The Old Radio
Once you’ve taken apart the surrounding trim pieces and have exposed the radio unit, you can start by disconnecting it. Note that the radio-slash-stereo unit is usually mounted to the dash in one of 3 ways. The process for removing the radio will thus differ:
- Spring Clips – This is where the radio/stereo is mounted using a metal sleeve and spring clips. To get the radio out, you’ll have to use DIN-standard radio removal tools. These are like U-shaped horseshoes. You’ll need to insert the DIN tools into the holes on either side of the radio/stereo unit. Then, you’ll hear a click, as the spring clips are released. Now hooked onto the radio, you can then pull it out.
- Bolted In – In this instance, the radio/stereo is secured to the dash with brackets and held in place with bolts. Unlike the spring clips, this will require removing interior trim surrounding the dash. As that’s complete, find the screws or bolts that secure the radio/stereo unit onto the dash. These are often mounted on the left and right sides of the radio unit. Unscrew them, and pull the radio free.
- Rail Mounts – Here, the radio is mounted to a guide rail inside the dashboard. Removing the stereo-slash-radio unit will be similar to the above. Either, release the spring clips or remove the screws or bolts holding it in place. Once that’s done, you’ll also have to remove the guide rails, as that might interfere with the new unit. Note, that once the guide rails are gone, you can’t reinstall the old radio.
Step 4: Wiring The New Head Unit In
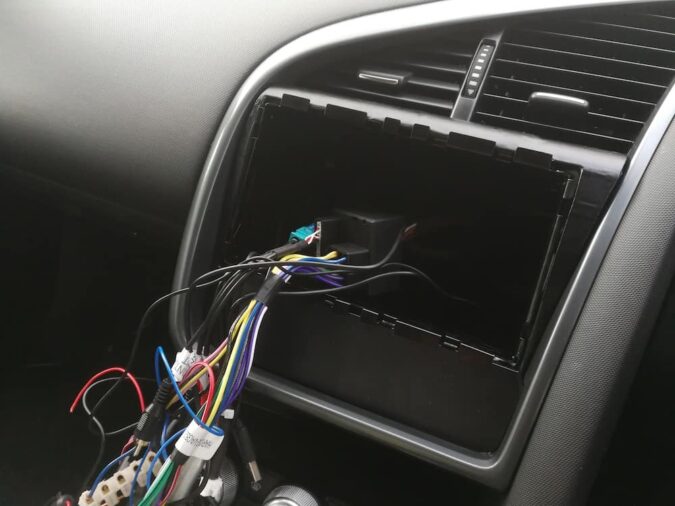
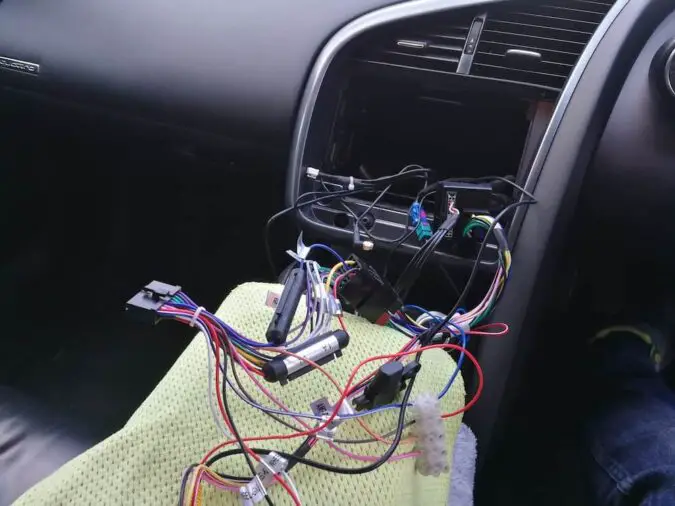
After you’ve removed the old radio/stereo unit, you can begin wiring in the new head unit. First up, you’ll need to remove all the wiring on the old one. Behind the old radio/stereo unit, there ought to be a webbing of wiring harnesses. These wires are usually secured to the radio with plastic clips. All you need to remove them is to pry these clips open to release the wiring harness but do so gently.
Remember that the wiring harness also connects to your car’s entire electrical system. If you have an older radio or stereo unit, you might also have to unplug the antenna. Now, you can wire in your new head unit. To put it simply, it revolves around matching up the colors of the wires to the connectors. Your owner’s manual or a repair manual should include a radio wiring and a color-coded diagram.
You’ll now have to compare two wiring diagrams – one for your car’s wiring harness, and a different one for your new head unit. Refer to these two diagrams to confirm what wires have to be connected from the new head unit to the wiring harness adapter. Here’s an example of the colors and what they do (this isn’t necessarily reflective of every vehicle or head unit):
- Grey – Right-front speaker (positive)
- Grey-Black– Right-front speaker (negative)
- White – Left-front speaker (positive)
- White-Black – Left-front speaker (negative)
- Red – 12-volts switched power
- Yellow – 12-volts constant power
- Orange – Illumination
- Black – Chassis ground
- Purple – Right-rear speaker (positive)
- Purple-Black – Right-rear speaker (negative)
- Green – Left-rear speaker (positive)
- Green-Black – Left-rear speaker (negative)
Step 5: Connecting The Wires
Once you’ve figured out the colors on the wires and how they correspond to the harness adapter, it requires connecting. It’s not sufficient to simply use tape to connect the wiring. The tape will dry out before the entire system loses connection and shorts out. For a more durable connection, you have 2 options – crimping, or soldering.
- Crimping – You can use either crimp caps or wire butt connectors.
- First, crimp two corresponding wires together – i.e. a ground wire to a ground connection.
- To do that, place them on a crimp clam, and clamp down on them.
- Alternatively, insert both ends of the wires into a butt connector, and clamp both sides.
- Soldering – Trickier than crimping, but soldering is more durable and long-lasting.
- Strip two corresponding wires by 0.5 inches
- Ideally, use a shrink wrap and apply 1.5 inches of it on one side, and at least 4 inches behind the ends of each wire.
- Overlap the two exposed and corresponding wires.
- Now, twist the two wires together until they’re conjoined and connected.
- Grab a soldering iron or torch.
- Next, heat up the wire and slowly feed the solder in until it covers the exposed wiring.
- Allow the soldered wires to cool for a bit.
- Then, tug gently on the two wires to ensure that the connection is secure.
- Lastly, and once the wires are cold, move that shrink wrap over the soldered parts. Electrical tape works as an alternative, too.
- All you have to do now is repeat this process with every wire.
- Before you mark this as complete, make sure that all wires are connected. And, that there aren’t any exposed wires on the back of the head unit.
Step 6: Mounting The New Head Unit
Last but not least, we can finally install the new heat unit. Before you do, however, it’s a good idea to re-connect your car’s battery, and try out the head unit first. This ascertains that the wiring is all connected properly. Thus, preventing you from needing to remove the head unit for troubleshooting later. If it’s working fine, disconnect the battery once more, and re-mount the new head unit.
The head unit will include some mounting brackets. You might even consider re-using brackets that came from your old radio/stereo, assuming it fits. Position the new head unit, and slide it gently into the opening on the dash. You can then secure the new radio/stereo in place. The technique required may vary from one head unit to another, so the instruction manual will be handy for this.
While you’re sliding in the new head unit, ensure that the wires on the back are tucked neatly. Make sure it’s not being pinched or squished in place. It might take a bit of trial and error. Or perhaps, you may have to make adjustments to your dashboard’s surrounding trim. Lastly, test the new head unit one more time, just to make sure. Then, you can finally set up an Apple CarPlay install.
Apple CarPlay: Need-to-Know Facts
- Apple CarPlay is a free system that utilizes the IOS system of an iPhone.
- Compatible hardware is needed to use CarPlay in a vehicle, including an iPhone and a head unit (built-in or aftermarket).
- CarPlay only works with iPhone 5, iPhone 6, and above, and is not compatible with other devices like iPads or Android phones.
- Purchasing a new iPhone is not necessary for CarPlay, as the latest model retails at $829, while the budget iPhone SE is available for around $429.
- An aftermarket head unit may be required for older car models, with CarPlay head units costing between $100 to over $350.
- Installation of the CarPlay head unit may incur labor costs of around $100, unless purchased through BestBuy or Walmart, which offer some free installs.
- Most compatible apps that work with CarPlay require no additional cost, although some premium membership apps may require a fee.
- Some car manufacturers may charge a fee to “unlock” CarPlay, such as BMW’s former $80 per year or $300 for 20 years fee, which has since been rolled back.
- Toyota and Volvo do not charge additional fees for CarPlay in their vehicles.
- For most people, CarPlay will be free of charge if they already have an iPhone and a compatible car, otherwise, additional costs for hardware and installation may be required.


